Alerts
Alerting is a core feature in DataGOL that allows you to create alerts and notifications in DataGOL for tracking key performance indicators (KPIs) effectively.
Alerts are powered by the conditions you create to track data. While you often use dashboards and widgets to visualize your data, the same underlying data and filters from those visualizations are used to build the alert conditions. For example, if you have a widget showing daily revenue, you can create an alert based on that widget that notifies you if the revenue drops below a certain amount.
Creating alerts
Creating an alert lets you define the conditions and notification settings for your monitor or rules to track data.
-
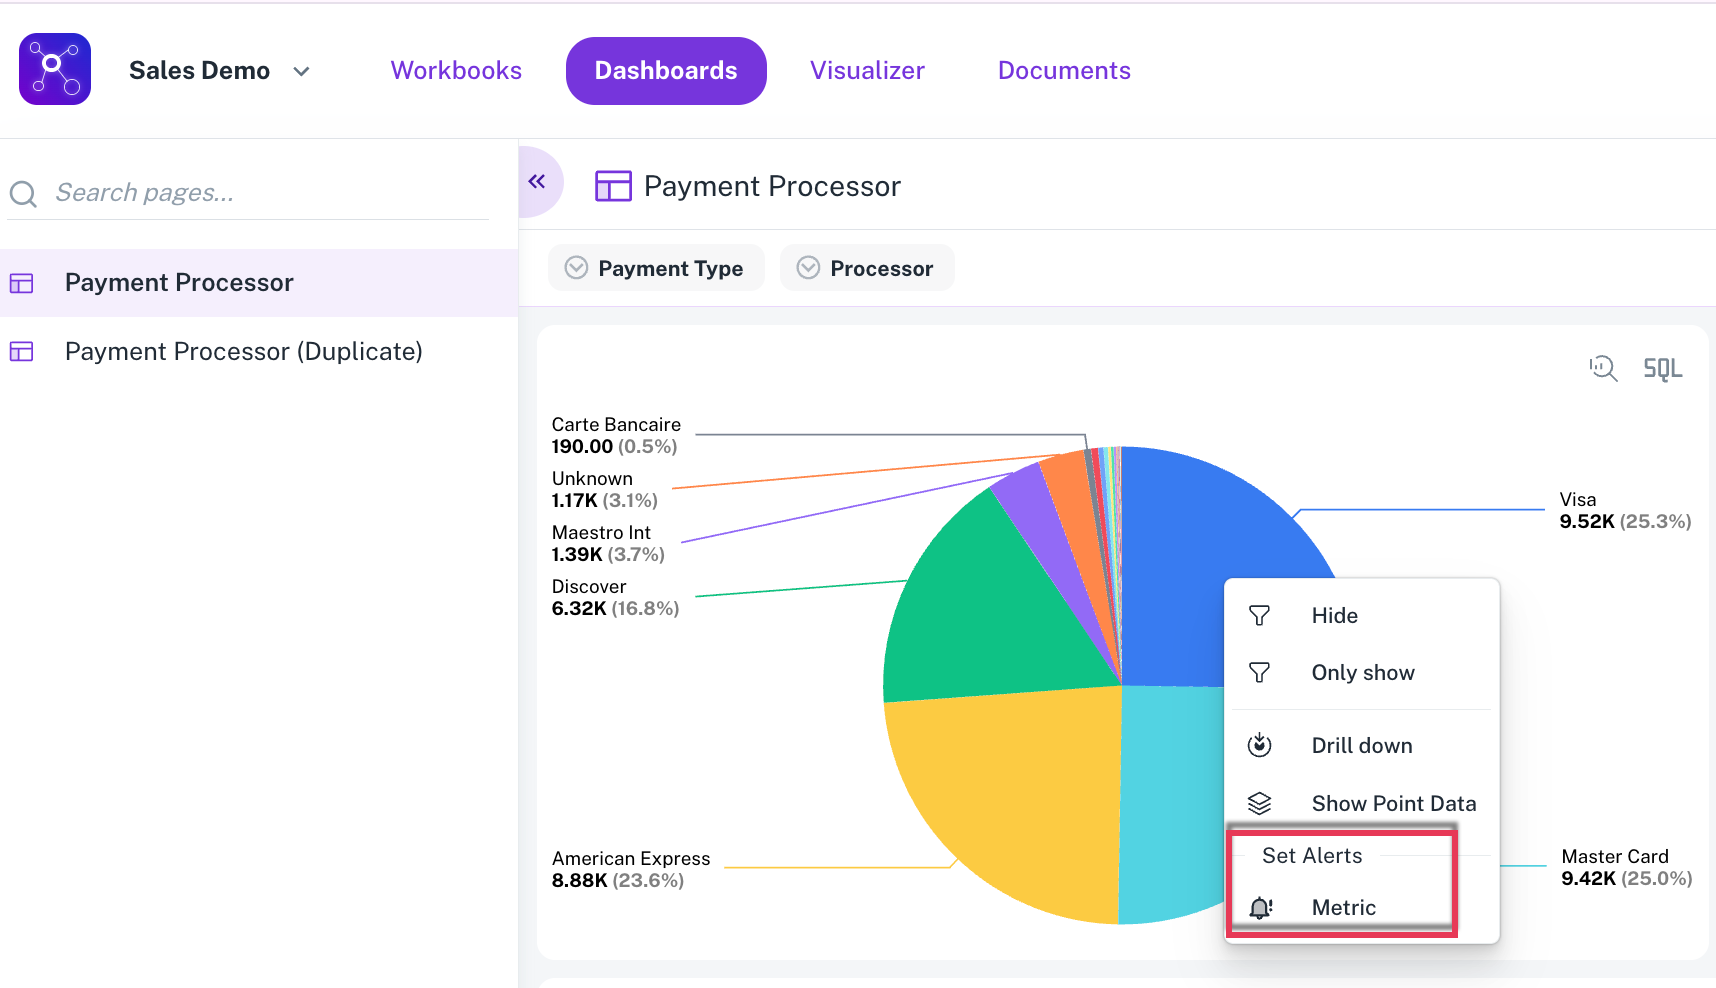
Select the widget. On your dashboard, right-click on the widget you want to create an alert for, select Set Alerts, and the respective metric for which you want to set an alert.
 info
infoThis action automatically pulls the widget's current metric, aggregation, and applied filters into the alert configuration. This is a quick way to ensure your alert is based on the same data you are currently viewing.
-
Define the alert conditions:
- Alert name: Give your alert a clear, descriptive name.
- Status: Choose whether to keep the Alert in an active or inactive state.
- Alert Metric: Displays the details of the alert metric. Confirm the metric and workbook details. These are auto-populated and cannot be changed. This section displays the workbook and columns used to set the alert alongwith the filters added to the widget and the period for the data.
- Thresholds:
infoThreshold is not a mandatory field. You can skip this step to receive alerts for daily notifications.
- Decide if you want to enable a threshold:
- If you want daily notifications without a threshold, skip this step.
- To set a threshold, click Enable and choose conditions (greater than, less than, etc.)
- Set the value that will trigger the alert. You can choose from different types of comparisons:
-
Standard threshold: Triggers when the value is greater than, less than, or equal to a specific number.
-
Percentage change: Triggers if the value changes by a certain percentage compared to a previous period (e.g., a 10% drop from the previous week).
-
Absolute change: Triggers if the value changes by a specific amount (e.g., a drop of 100).
-
Comparison period: If you choose a percentage or absolute change, you must define the comparison period. This can be "Previous Day," "Previous Week," or "Previous Month." This setting is only available when a relative date filter (like "Today" or "This Week") is applied to the widget.
NoteAbsolute change, Percentage change, Percentage increase by, and Percentage decrease by values are enabled only if there is a period comparison.
-
-
Set the schedule: Define how often the alert will run.
-
On a schedule: You can set a cron expression for the alert to run daily, weekly, or monthly. The shortest available duration is hourly.
InfoAlerts are set in UTC standard time. When you set the UTC time, the local time is displayed with the schedule instructions. You can add or subtract your time zone's offset from the UTC time to set the schedule as per your local time.
-
On data change: In future updates, you can configure the alert to run automatically whenever the underlying data changes, which is a good option for operations or data teams.
-
-
Configure notifications:
- Subscribers: Specify who will receive the alert. The alert creator automatically becomes the primary subscriber, and they can add other subscribers to the list by entering their email addresses. Only subscribed users will receive notifications.
- Message: You can customize the notification message with details about the alert.
-
Save the alert: Once you have configured the settings, click Save Alert. The alert is now active and will begin monitoring the data according to your schedule and conditions.
An alert with a "Percentage Increase By" threshold is triggered when a value increases by more than a specified percentage.
For example, with a threshold set at a 30% sales increase, an alert wold be triggered if sales rose from 100 to 140, as this represents a 40% increase—exceeding the 30% threshold. However, an increase from 100 to 110 (a 10% increase) would not trigger an alert because it does not meet the minimum percentage. Similarly, a decrease in sales, such as from 100 to 80, would not trigger an alert either, since this type of alert only monitors positive growth.
- Ensure that the correct email addresses are entered for notifications to avoid missing important alerts.
- Be mindful of the time zone settings when scheduling alerts.
Alert triggering
The following types of alert notifications are triggered:
-
Threshold-based notifications
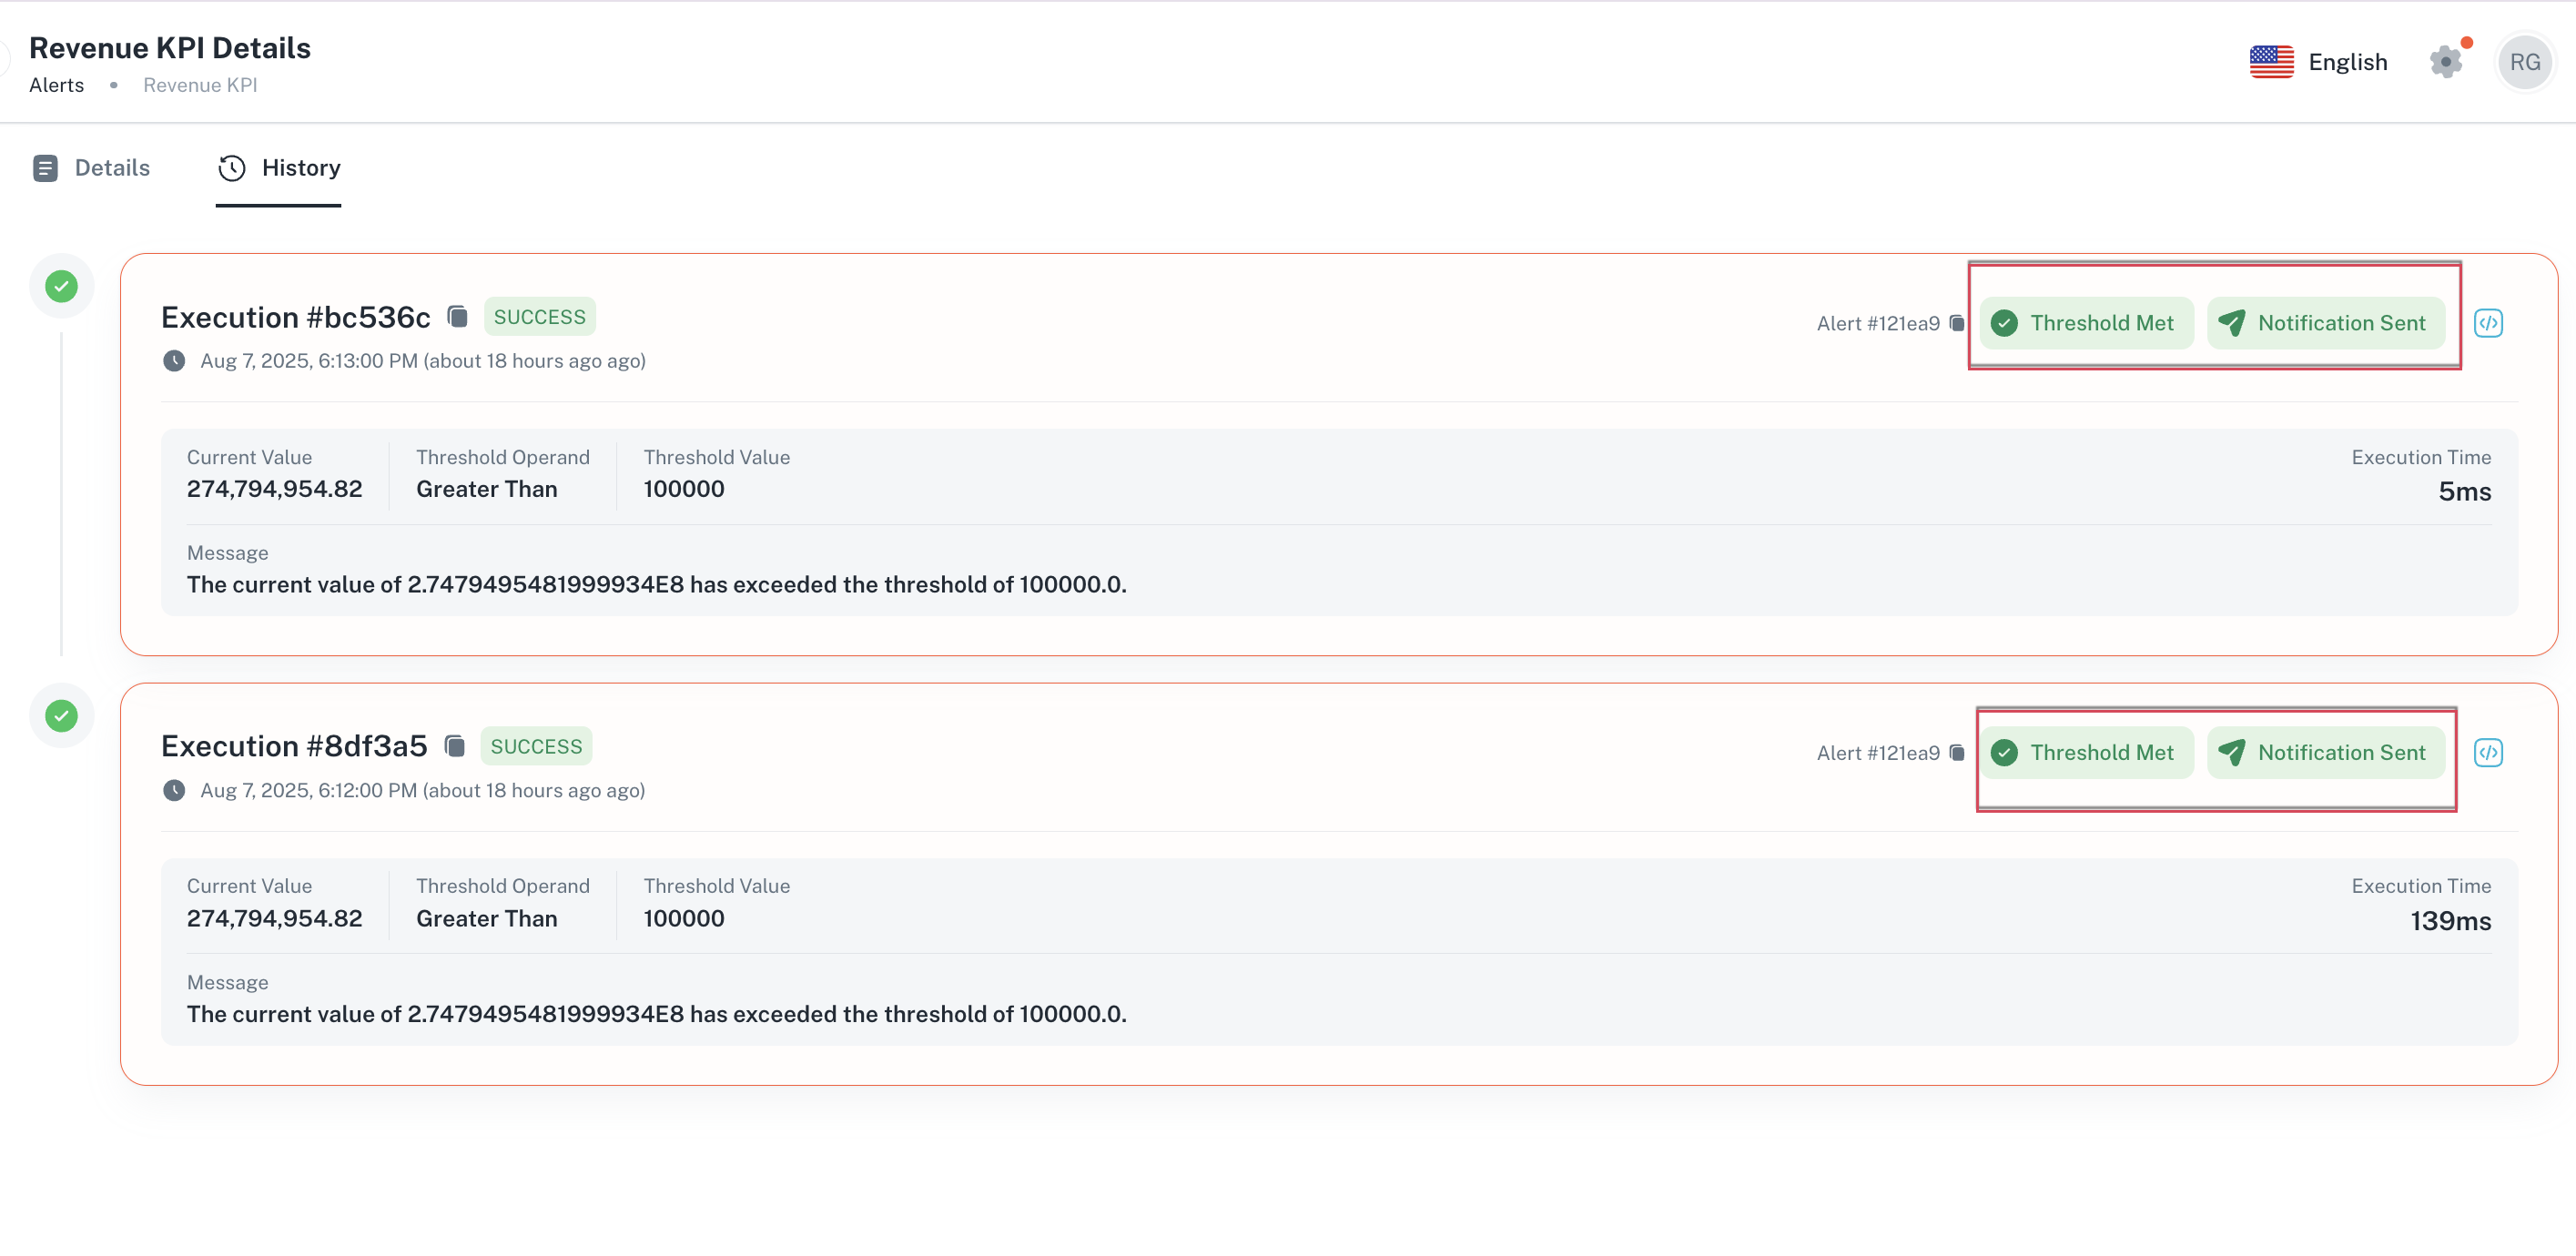
A notification is automatically sent the moment a predefined value, or threshold, is met or exceeded. For instance, you could set a threshold that sends an alert if a server's CPU usage goes above 80%. This type of alert is event-driven; it only occurs when a specific condition is fulfilled.
In threshold-based notification systems, the following two situations occur:
-
An alert is sent when a specific threshold is met.
-
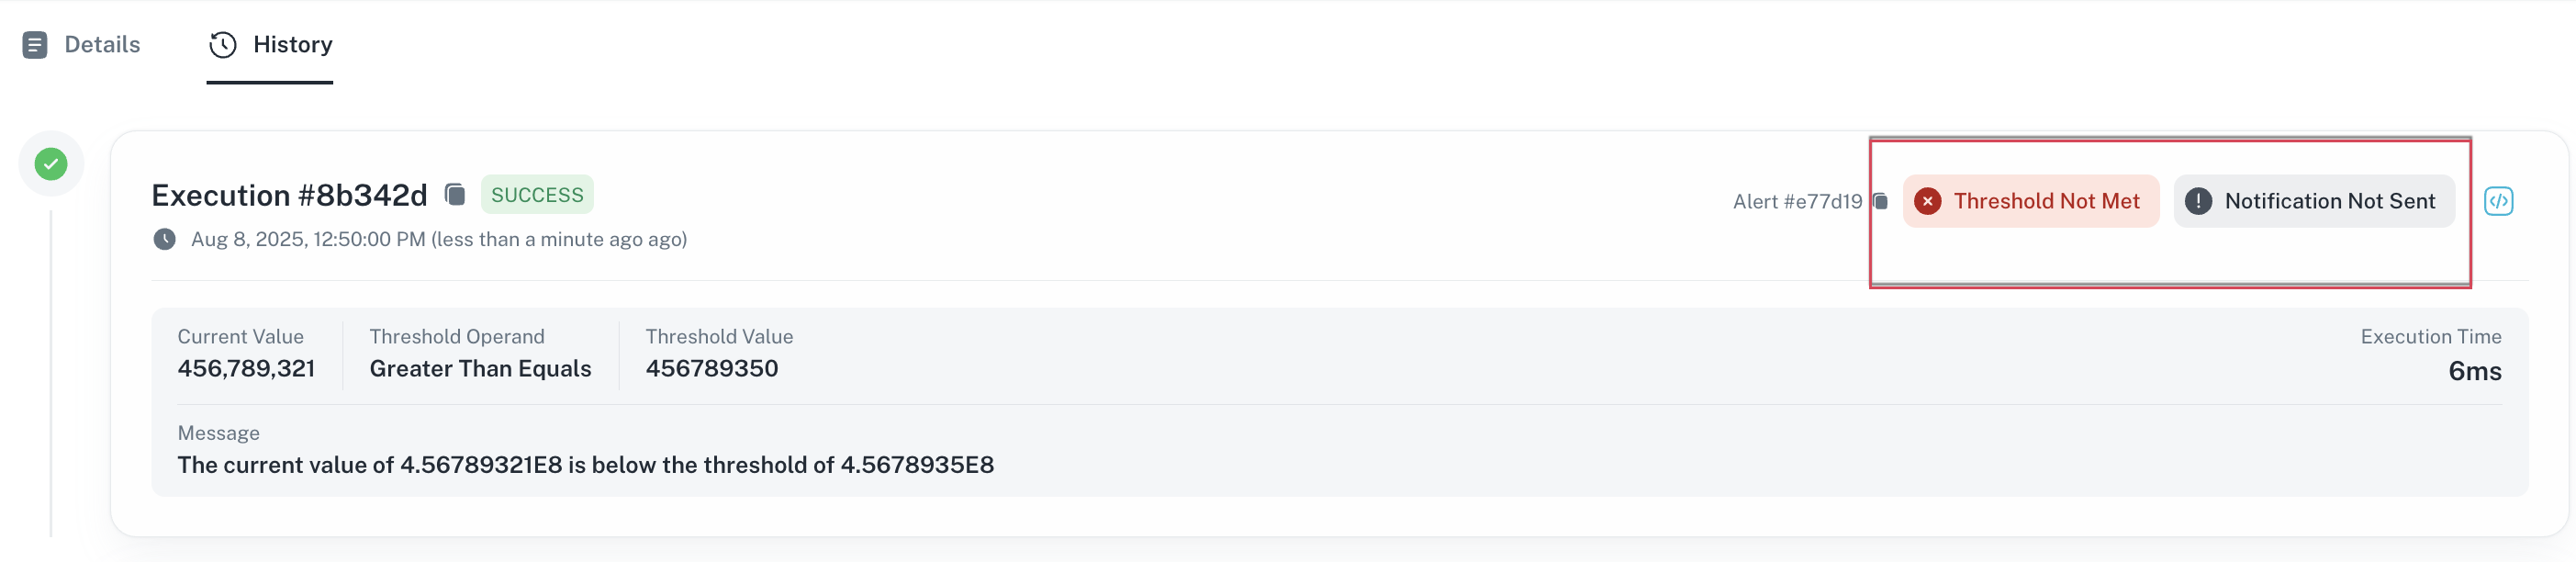
If the threshold is not met, no alert will be delivered.
-
-
Time-based notifications
Notifications can also be delivered on a fixed schedule, regardless of any other conditions. If you configure a time-based alert, such as a daily or weekly report, the system will send it at the designated time even if no thresholds are set. This is useful for getting regular status updates or summaries.
If a daily or weekly notification is configured, it will always be sent at the scheduled time.

Accessing saved alerts
You can access saved alerts and its execution history as follows:
Alerts on home page
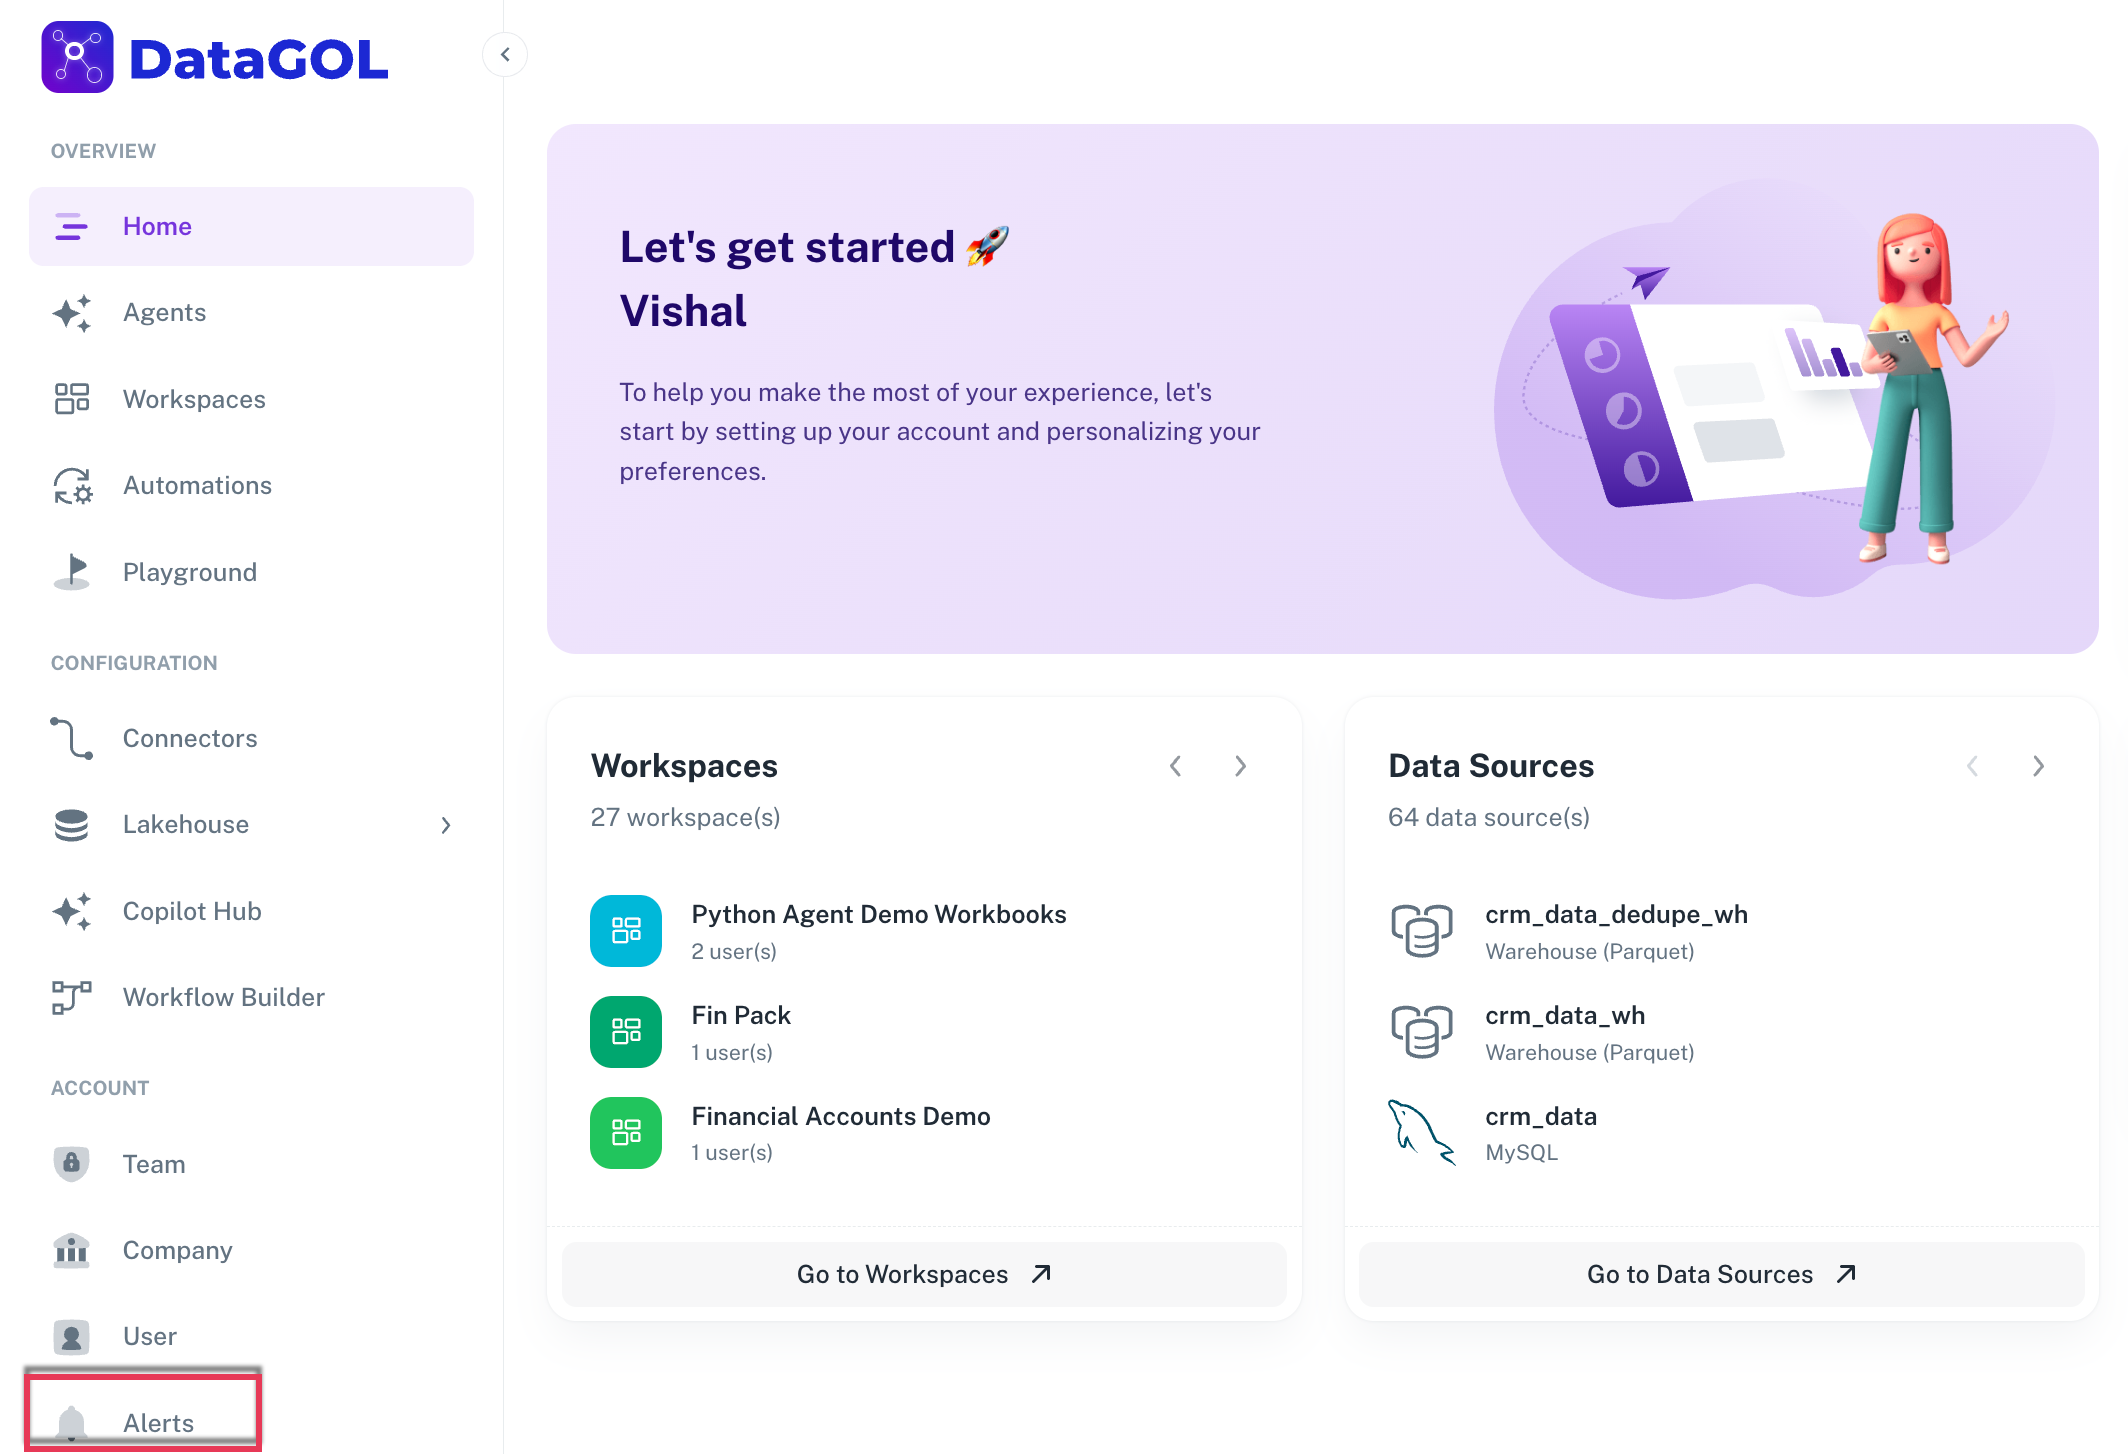
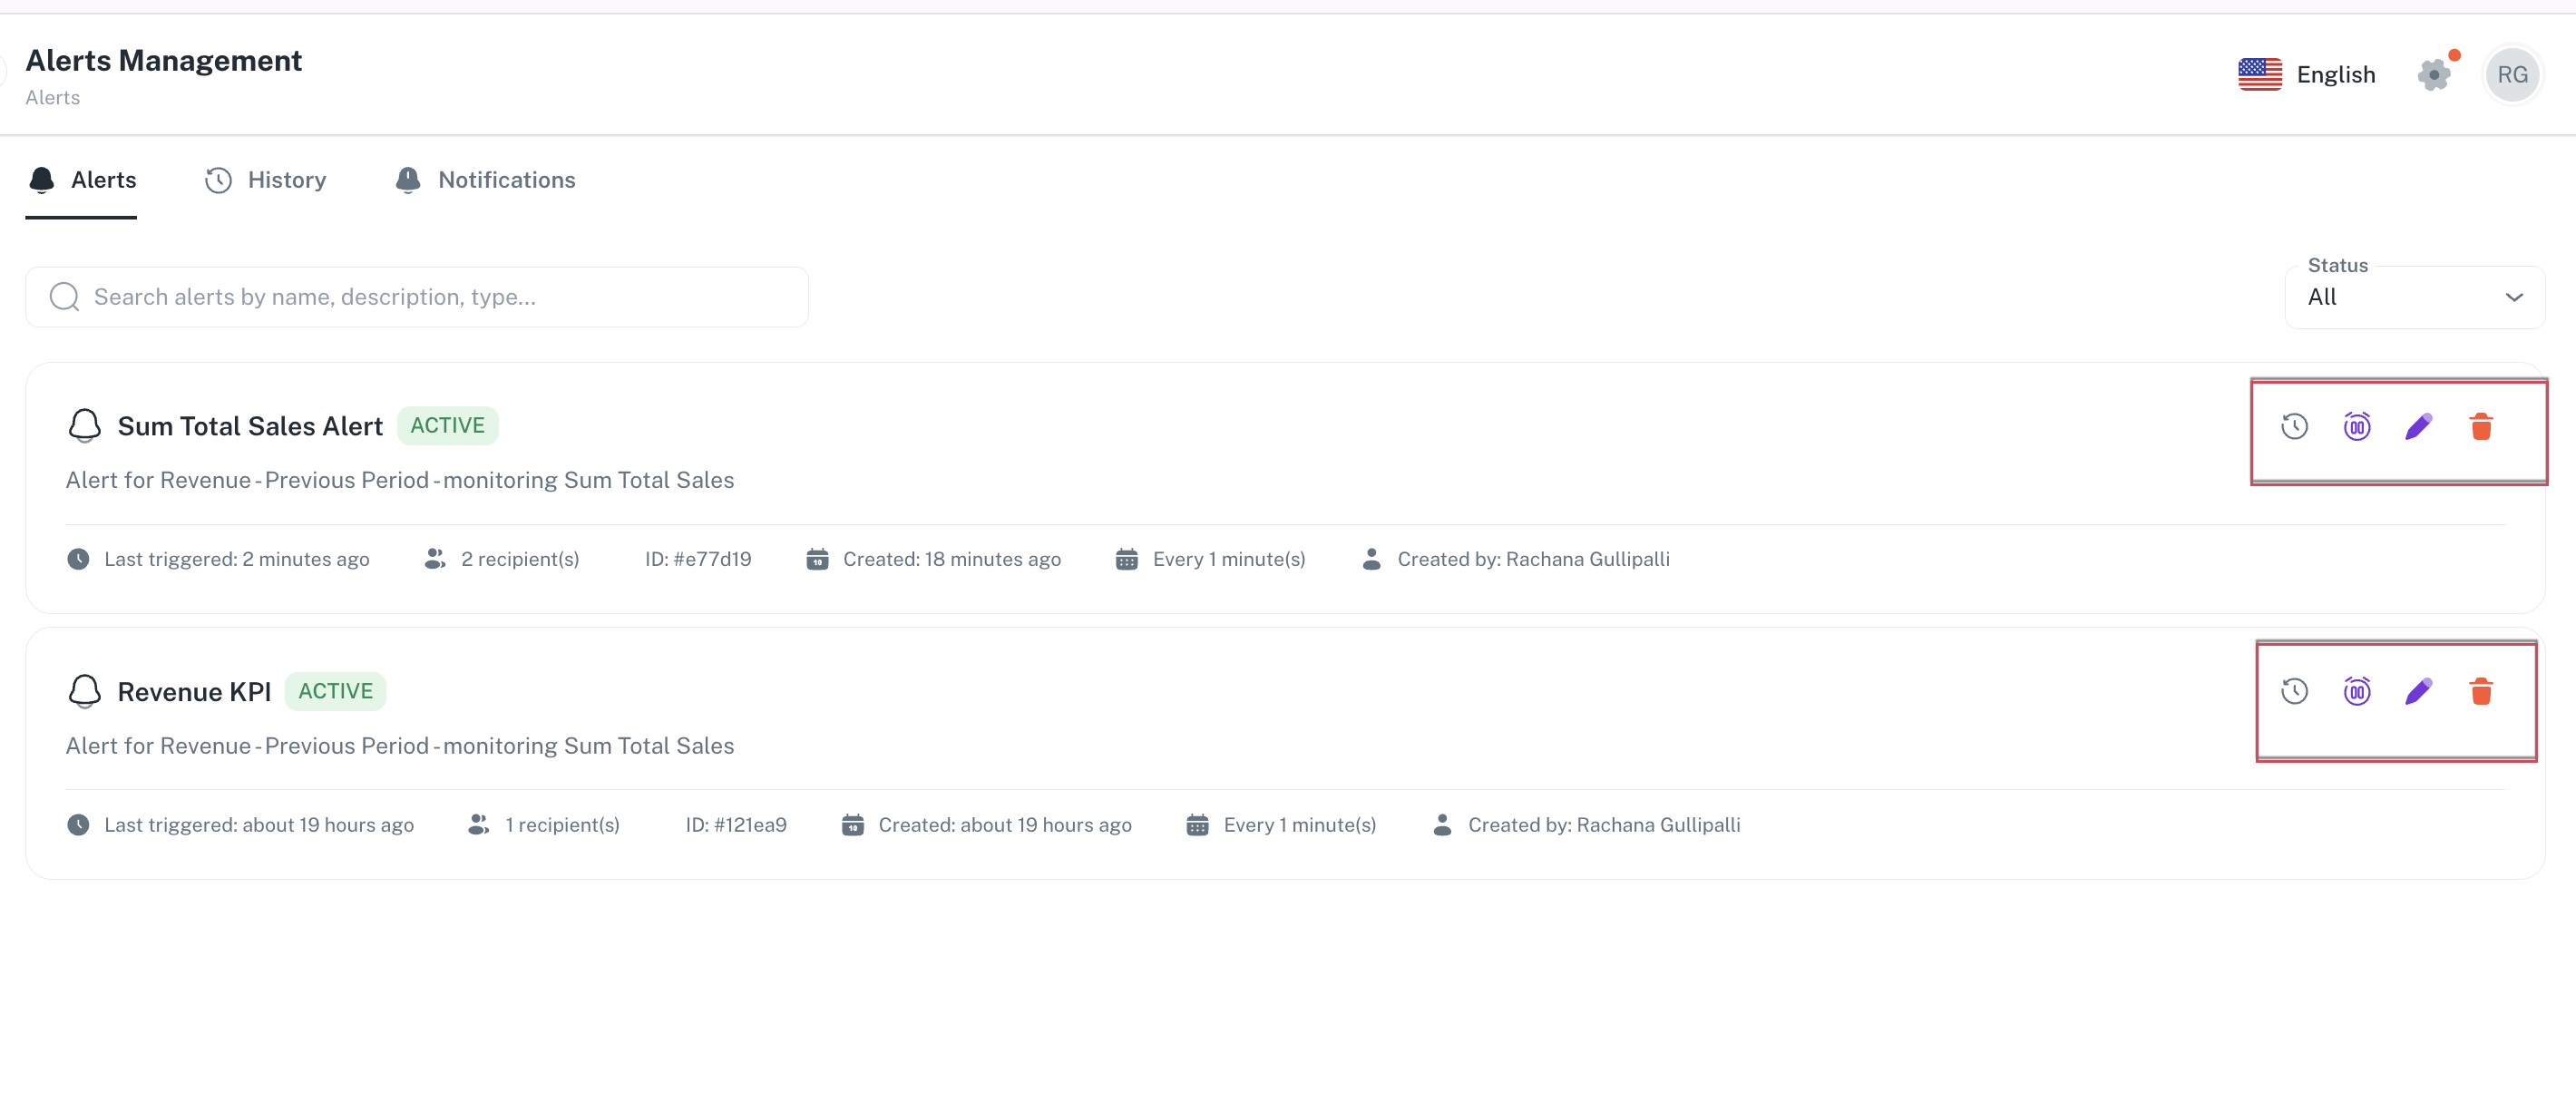
From the Home page, on the left navigation panel, click Alerts. The Alerts Management page is displayed. This is the central location where you can view all the alerts to which you have subscribed.
The following tabs are displayed on the Alerts Management page:
-
Alerts
Here, you can view a list of every alert that has been created. Details such as when was the alert last triggered, when was the alert created, who created the alert,when the alert was created, and how many recipients are there for each alert are shown here. You can edit, delete, deactivate, or unsubscribe an alert from here.
-
The creator of the alert has full control and can deactivate, edit, or delete an alert.
-
Subscribers to the alert can unsubscribe from it if they no longer wish to receive notifications and view the alert history.
-
Deactivating an alert stops it from running but does not delete it.
-
-
History Displays the execution history of all the alerts. The history log provides details such as the current value of the metric, the set threshold, and whether the threshold was met.
-
Notification: Displays all the notifications for the alerts that have been triggered. This records every time a notification was sent to a user. One execution can result in multiple notifications if there are multiple recipients.
Alert notifications
You will receive alert notifications in an email as well as on the dashboard:
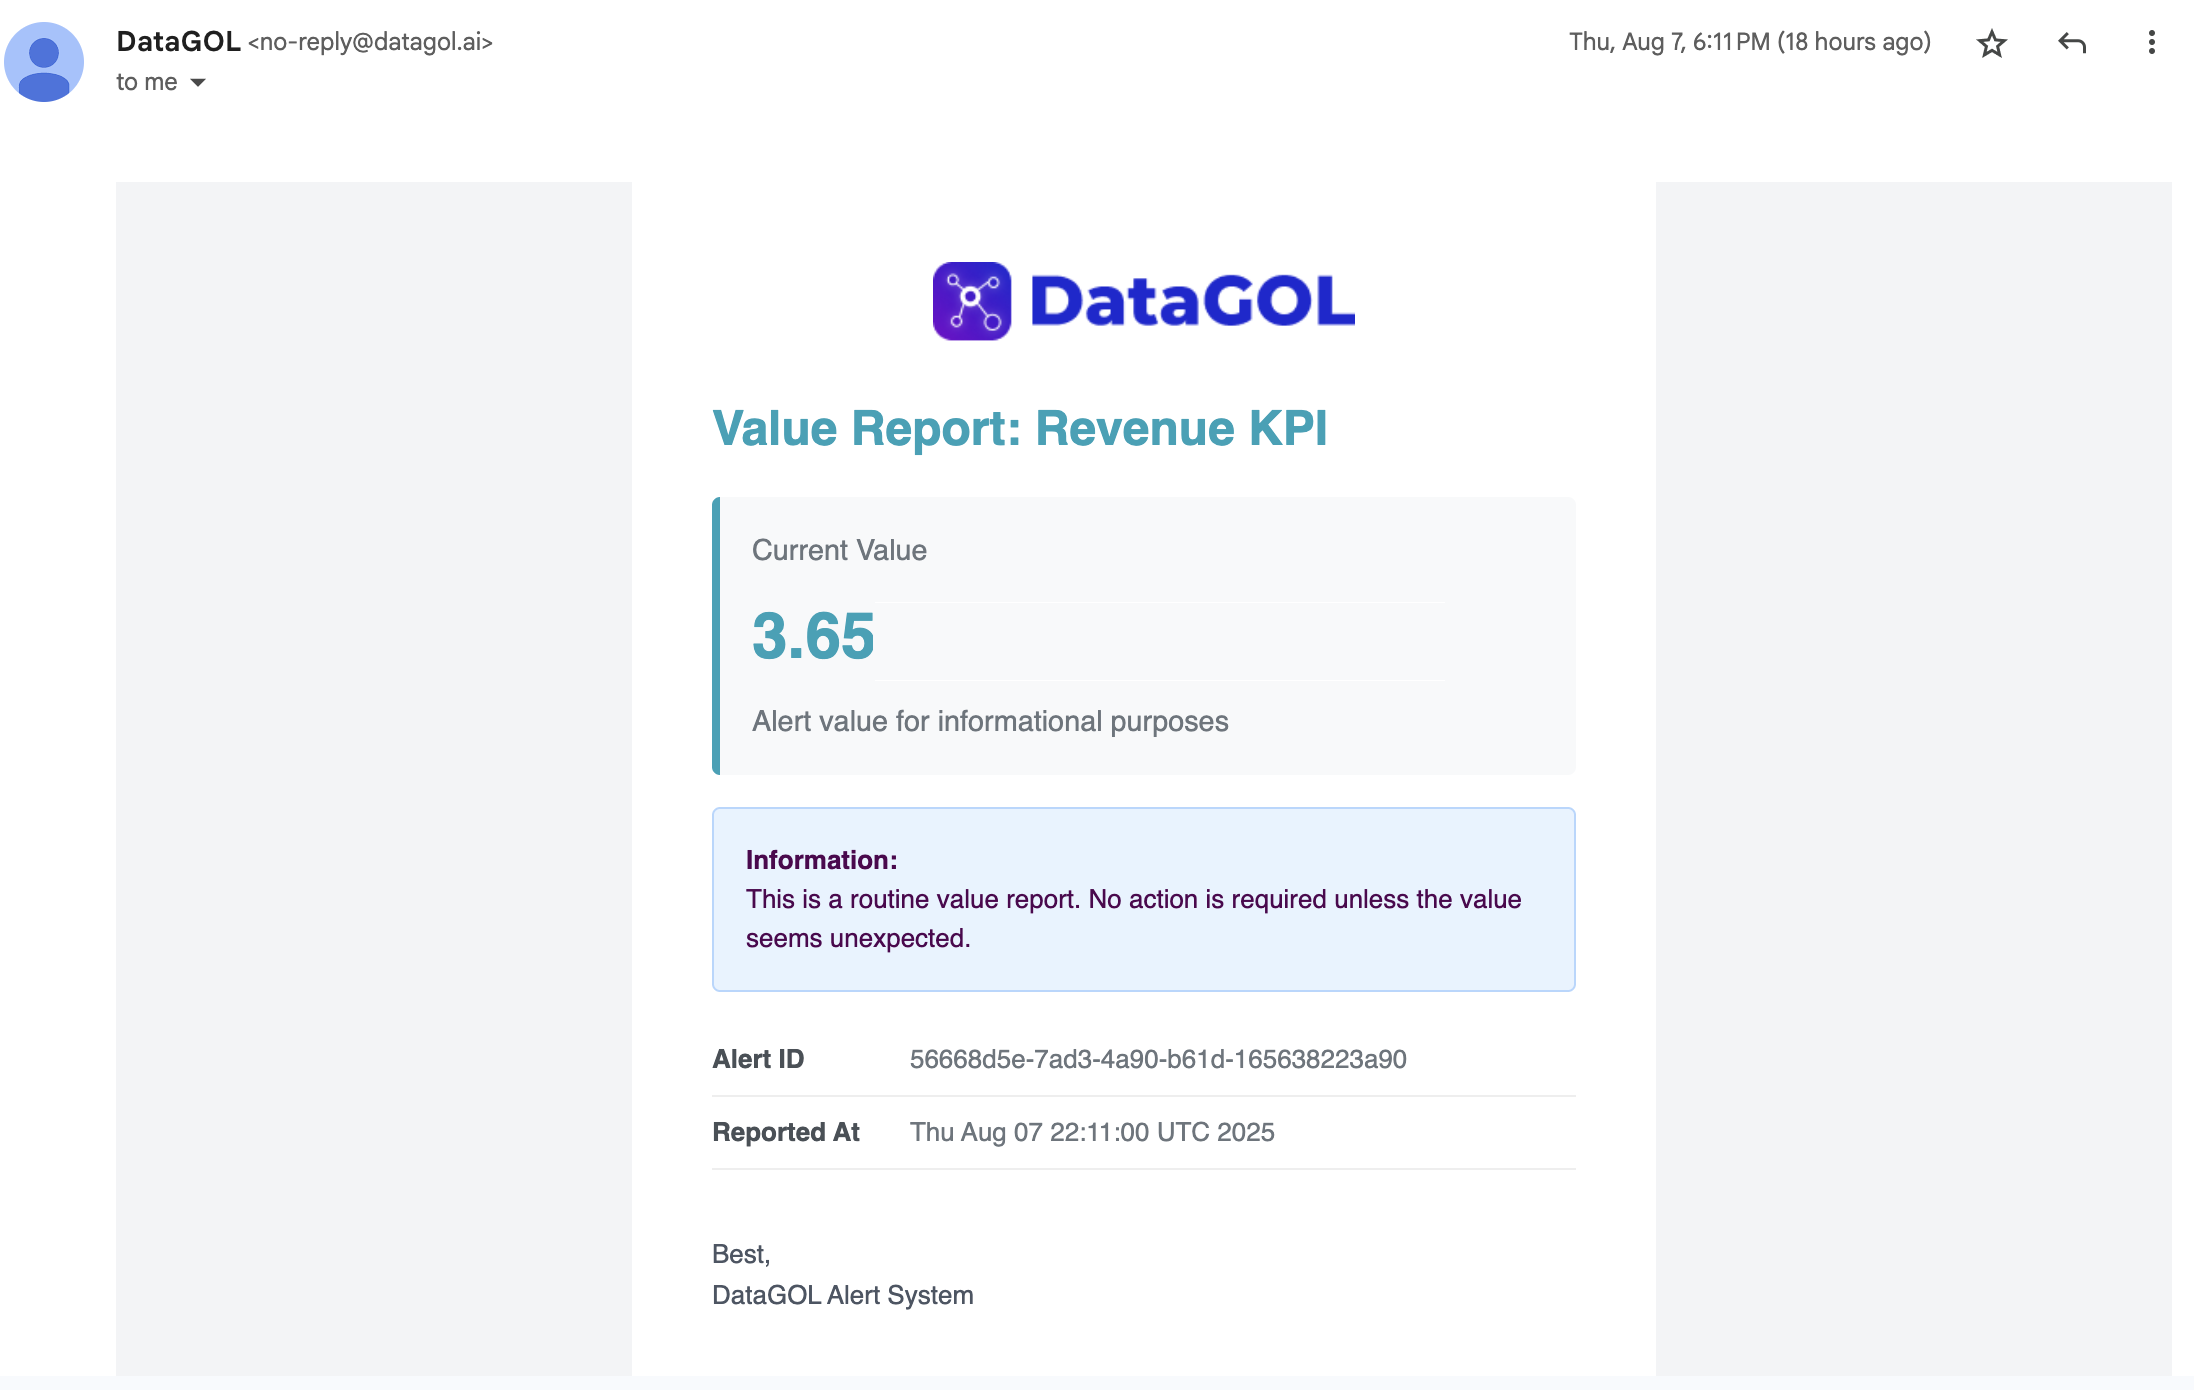
Email
When an alert is generated based on the trigger conditions, an email is sent to all the subscribers. Emails will include title, current value, threshold details, and trigger time.
Dashboard
- When an alert is triggered, a red notification icon will appear on your dashboard page. The same red icon will also appear on the specific widget that triggered the alert. Clicking on the icon on the dashboard will take you directly to the widget with the alert.
- Regularly review and update alert thresholds to ensure they remain relevant.
- Utilize the history section to analyze past alert performance and adjust settings accordingly.
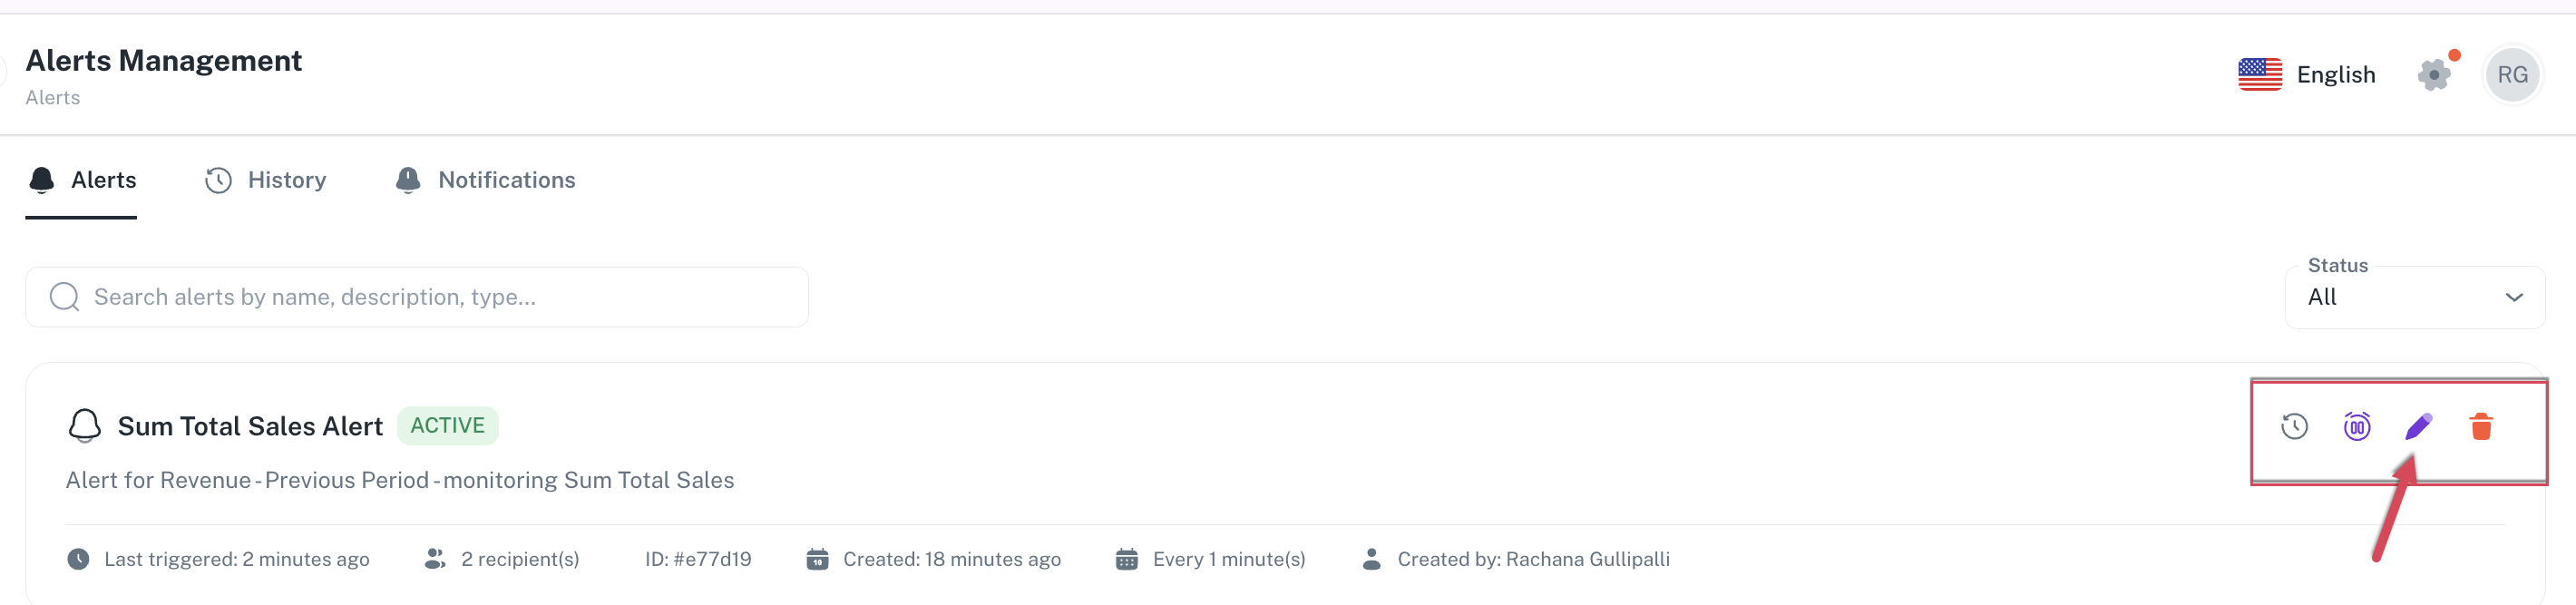
Editing an alert
Only the Alert creator can edit an alert.
-
From the Home page, on the left navigation panel, click Alerts. The Alerts Management page is displayed.
-
Click the edit icon corresponding to the alert you want to edit and edit the details.
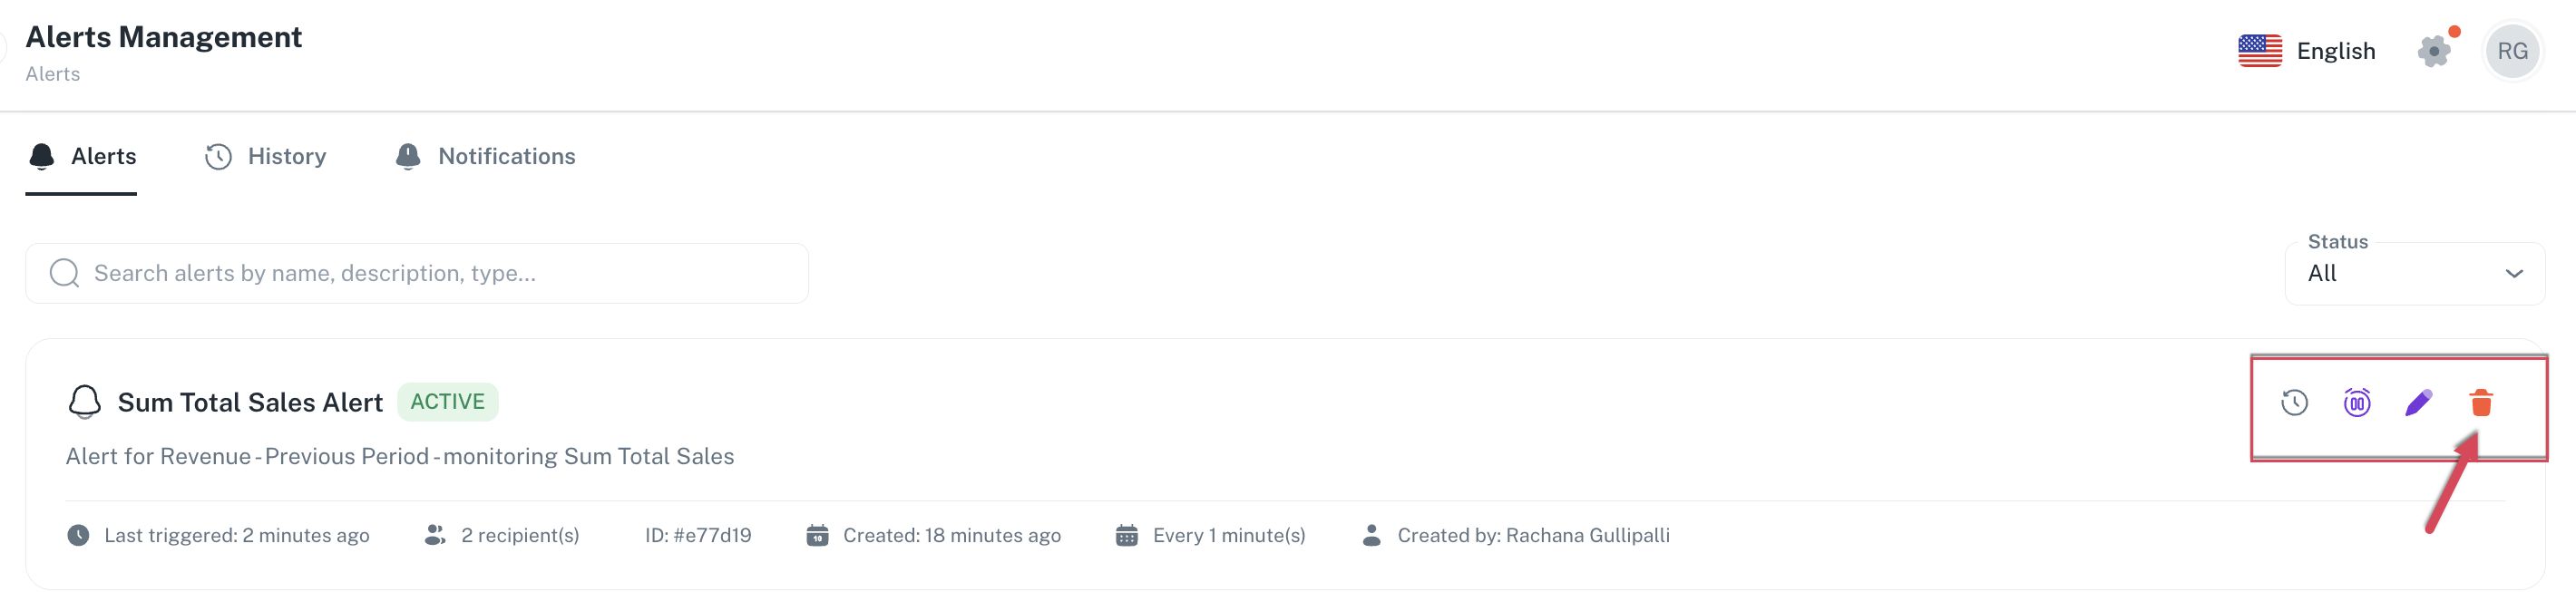
Deleting an alert
Only the Alert creator can delete an alert.
-
From the Home page, on the left navigation panel, click Alerts. The Alerts Management page is displayed.
-
Click the delete icon corresponding to the alert you want to delete to delete the alert.
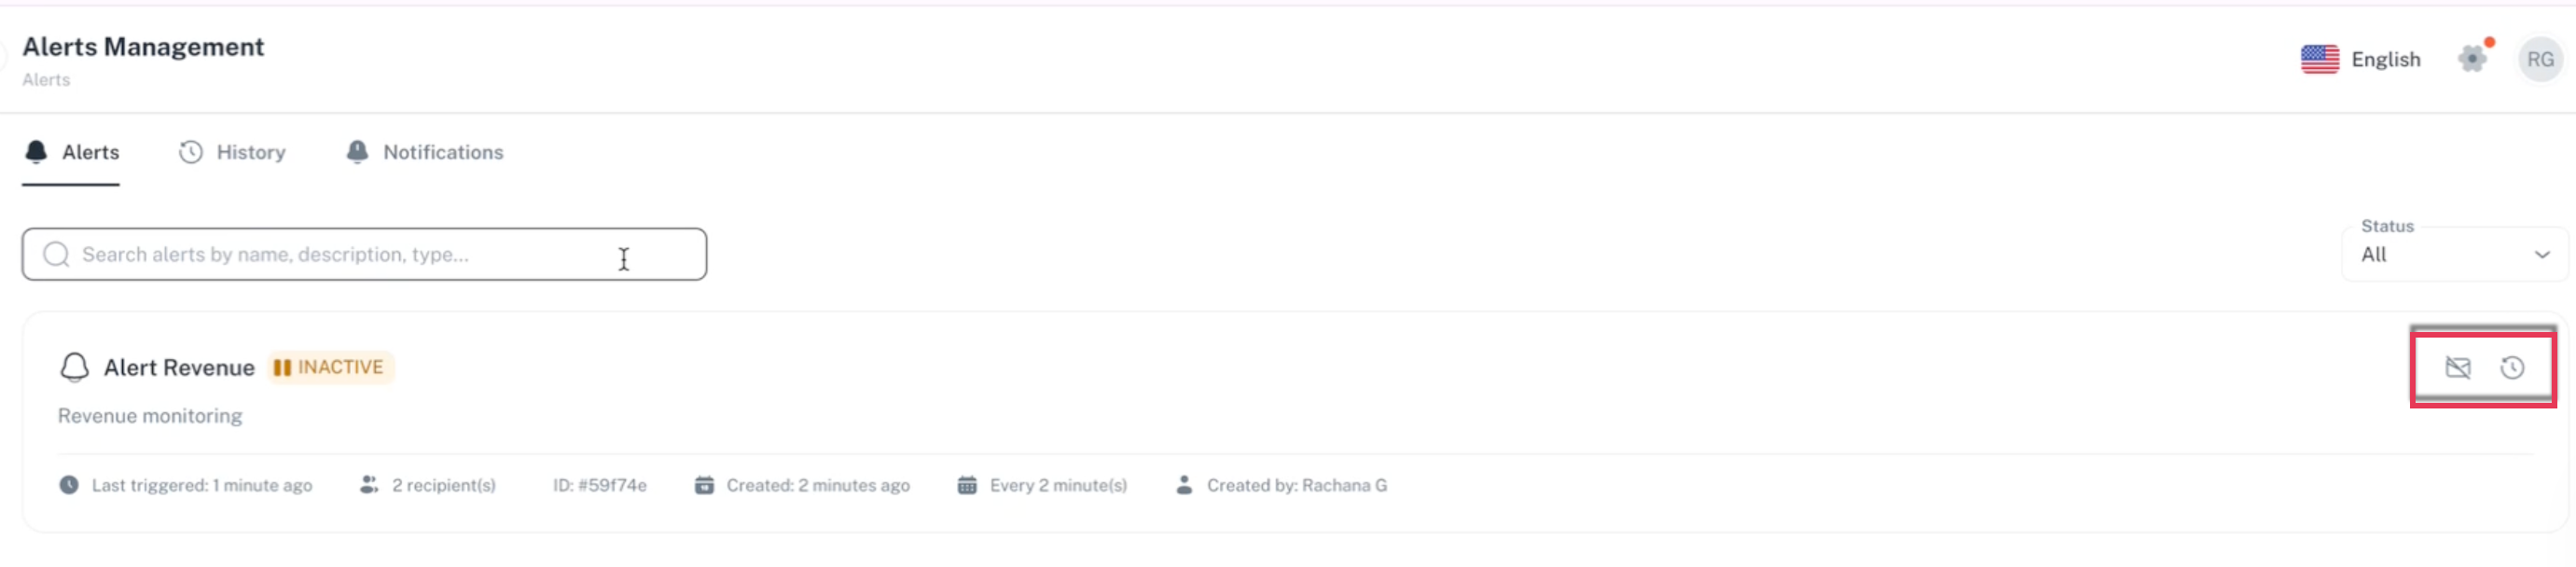
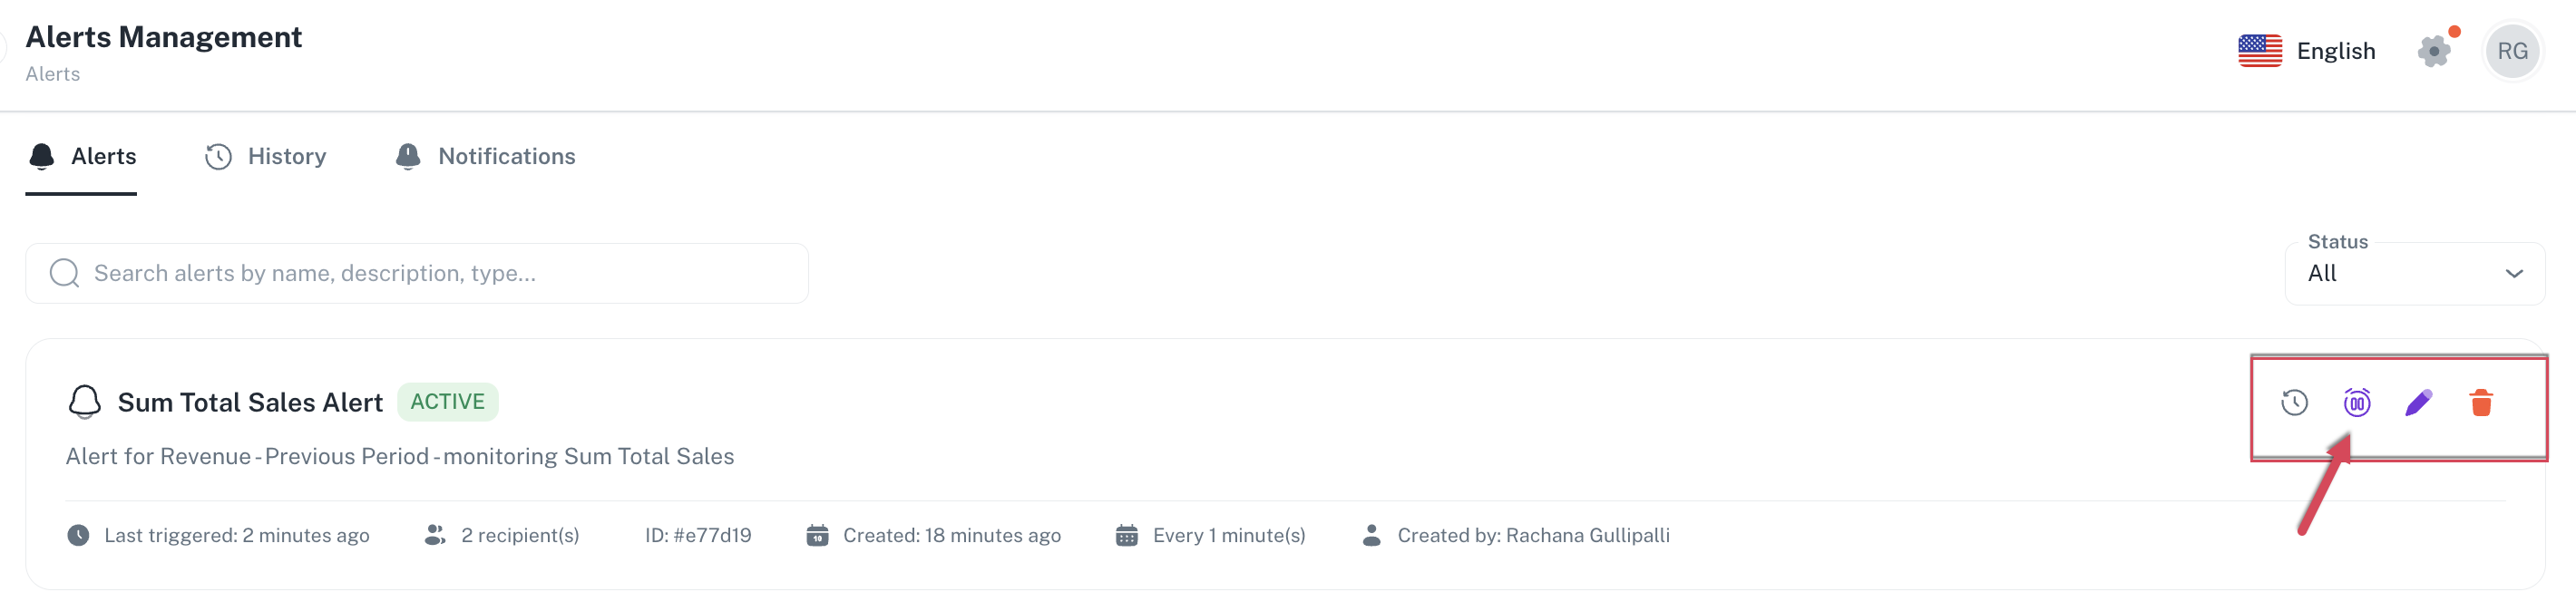
Activating / Deactivating an alert
Only the Alert creator can activate or deactivate an alert.
-
From the Home page, on the left navigation panel, click Alerts. The Alerts Management page is displayed.
-
Click the activate/deactivate icon corresponding to the alert you want to activate/deactivate.
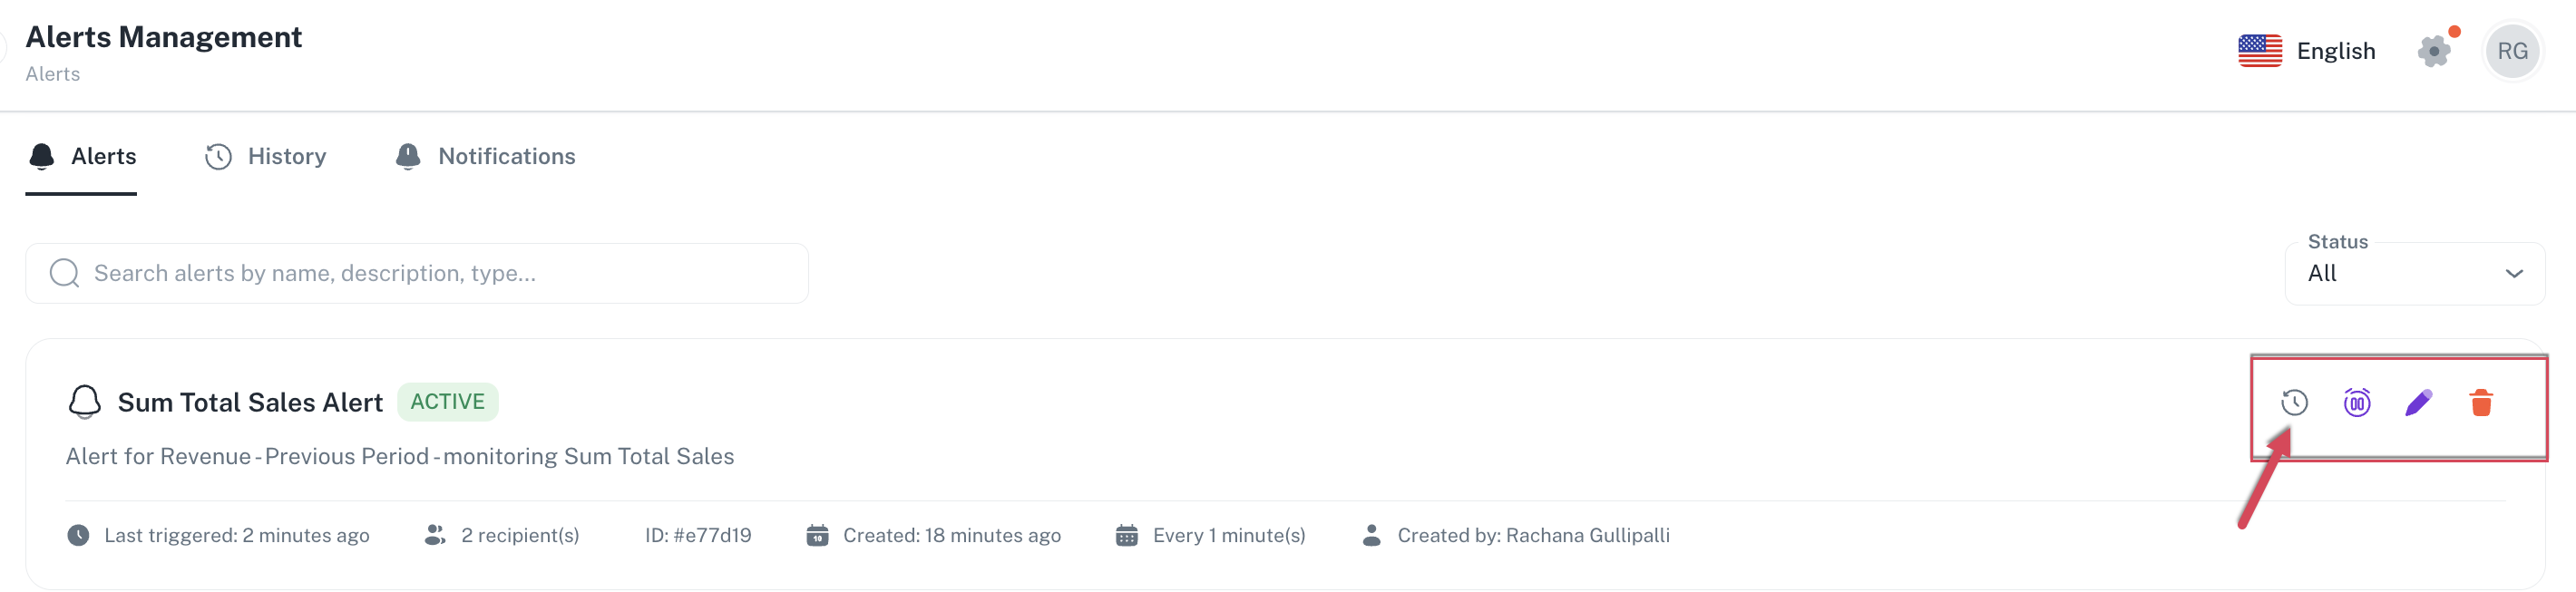
Viewing history of an alert
The alert creator as well as the alert subscribers can view the alert history details.
-
From the Home page, on the left navigation panel, click Alerts. The Alerts Management page is displayed.
-
Click the history icon corresponding to the alert for which you want to view the history details. The alert record details are shown.
Limitations
- Parameters: Currently, alerts do not fully support parameters. If a widget uses a parameter, the alert will default to the parameter's default value. This is a known limitation that will be addressed in a future update.
- User roles: The ability to create alerts is not tied to edit permissions for a dashboard. Any user with view access to a dashboard can create their own alerts based on the data they can see.
- Alert status: Even if you do not set a threshold, an alert will still be sent, providing the current value of the metric. This is useful for simply getting a periodic update on a specific metric.
Was this helpful?